Make audits easier with PowerBI Robots

Joel Monteiro
February 5, 2021Anyone who went through an audit process knows that they are a necessary evil of the corporate world. They exist to ensure the compliance of financial statements, but the audit evidence gathering process can be a time-consuming and messy task, especially for unprepared organizations. When that evidence is spread across multiple platforms, preparing for an audit often translates to several work hours getting everything ready to make the auditor’s job easier so everyone can return to their regular tasks.
With these time and organization concerns in mind, our team saw the potential of pivoting PowerBI Robots as an audit evidence tool.
As you are probably familiar with, one of PowerBI Robots’ key-features is the ability to take pictures of Power BI reports and dashboards and sending them to a destination of the users’ choice. Email is usually the preferred method, but PowerBI Robots can also send reports to a SharePoint library, a file system, or the web, so they are displayed anywhere. Starting with version 2.6.2, PowerBI Robots will also support Azure Blob Storage as a delivery method, effectively working as an audit evidence tool.
How does PowerBI Robots work as an audit evidence tool?
A picture is worth a thousand words and PowerBI Robots can be programmed to take thousands of pictures of Power BI Reports and Dashboards. With the new Azure Blob Storage delivery method, these pictures are kept at a company’s Azure Storage neatly organized according to the user’s preference, be it by hour, day, week, month, etc. PowerBI Robots saves the changes a report or dashboard goes through over time and this record can, among others, serve as proof of an organization’s financial statements over time to help auditors do their job.
In this article, we’ll teach you how to use this new delivery method and set up an automation system that takes screenshots of your Power BI reports and dashboards and makes them easy to find by an auditor.
Setting up the PowerBI Robots desktop agent
Before getting started, you must have an Azure Blob Storage set up in your organization’s Azure Portal. If you don’t have administrator privileges, please contact your organization’s IT administrator to do it since this is a very technical step requiring those privileges.
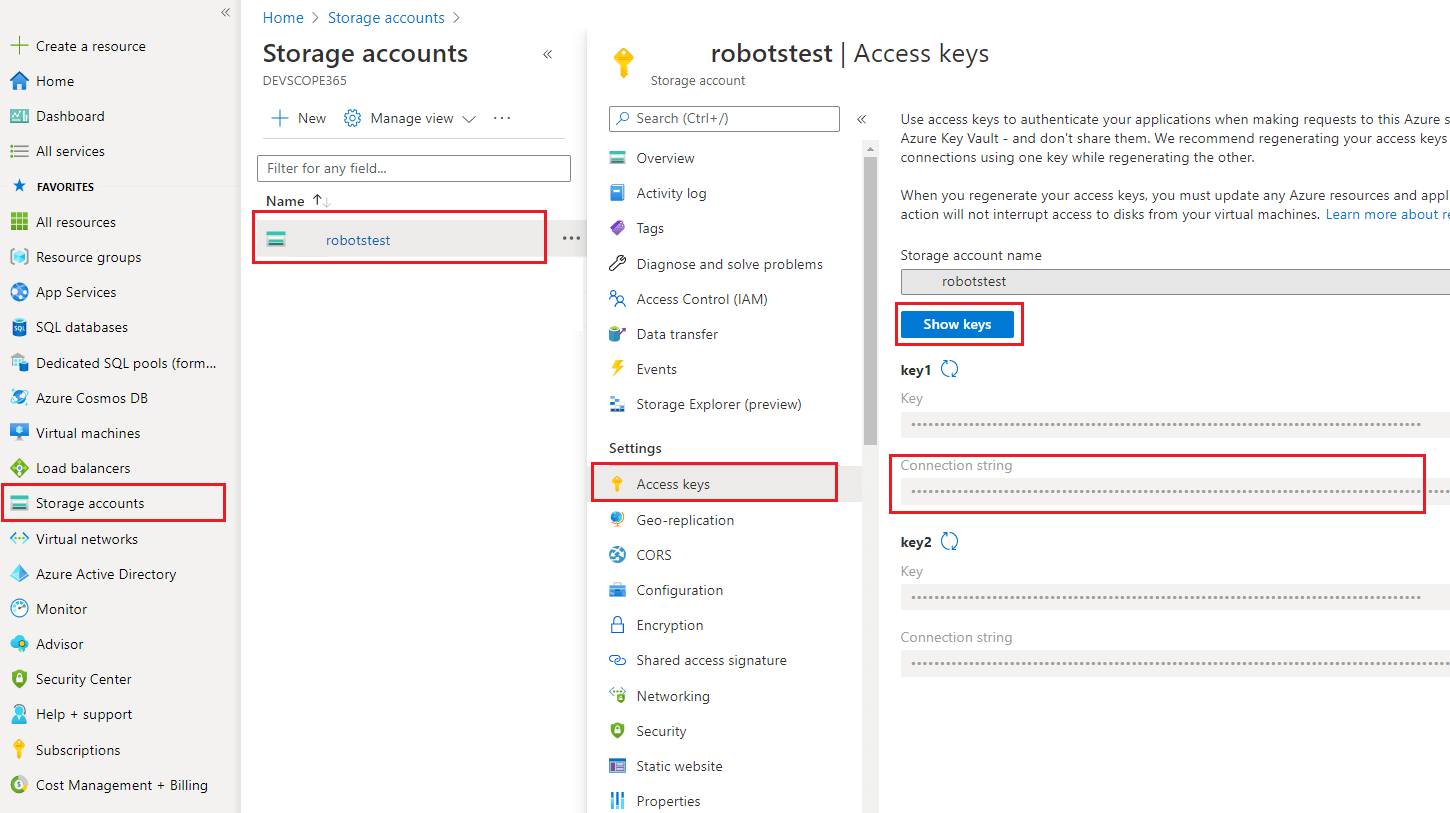
If you already have an Azure Blob Storage set up, go to your organization’s Azure Portal and navigate to Storage Accounts. Select the storage account of your choice, click Access Keys and copy on the connection strings.
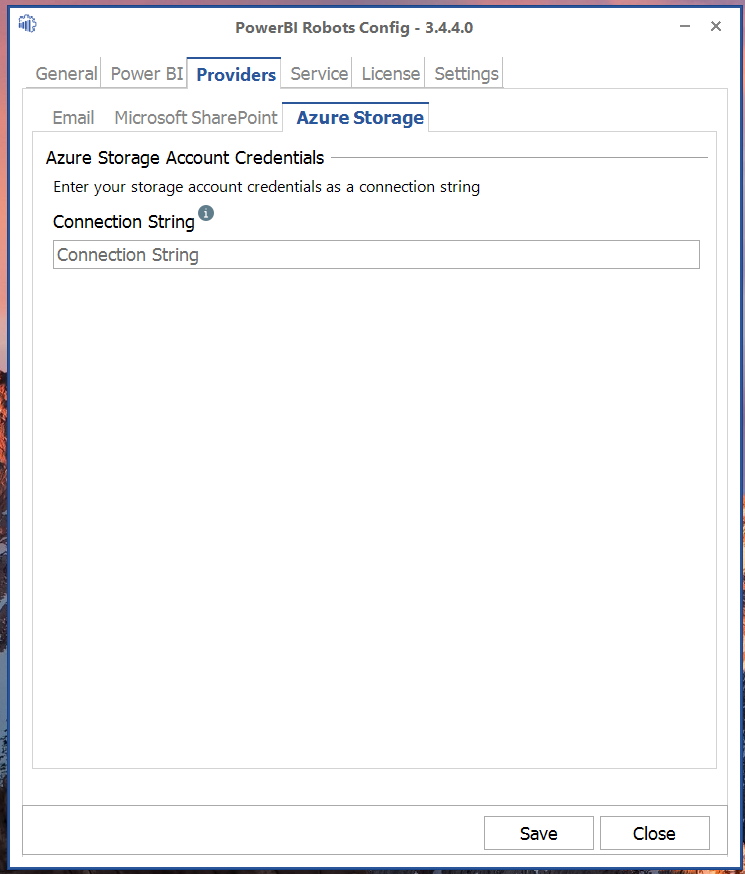
Next, open the PowerBI Robots desktop agent (make sure you have version 2.6.2 or greater installed), go to the Providers tab, select the Azure Storage subtab, and paste the Azure Blob Storage connection string here.
Click save and close the PowerBI Robots desktop agent.
Setting up a Playlist on PowerBI Robots
Open the PowerBI Robots web agent and create a new playlist. There will be a new option in the General tab under Deliver To: Azure.

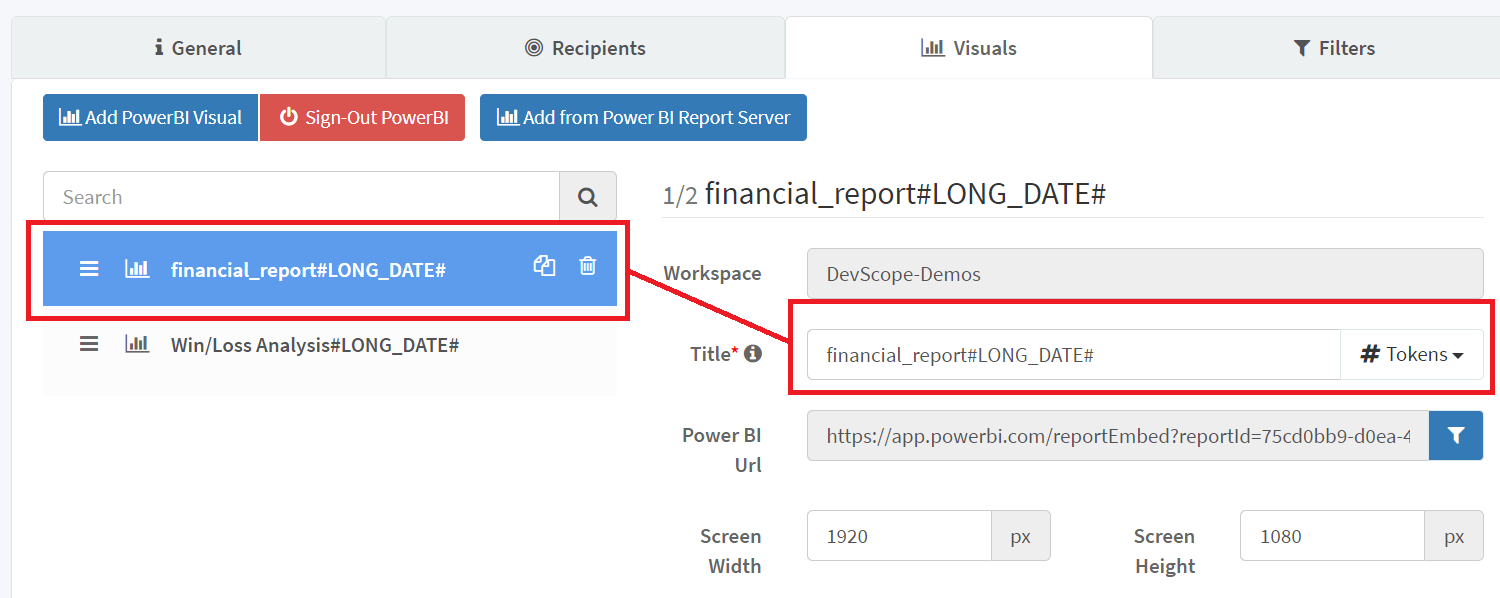
Once you select this option, name your playlist, select its output format (image, PDF of Excel file) and set its recurrence. Since we are setting this up intending to help auditors do their job, we should make full use of tokens in the File Name, so it’s easier to track changes on a report over time. In the following example, we are going to use the Long Date token:

The use of this token translates to the following file format:
You can choose between the following range of tokens which will change your output files’ names accordingly:

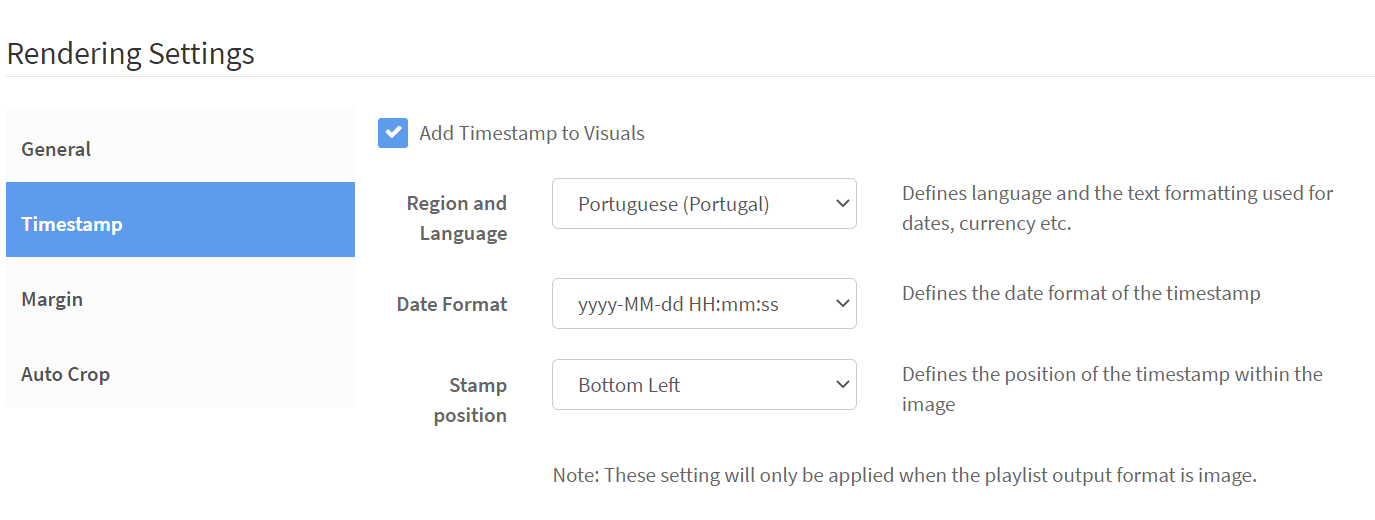
Additionally, you can add a Timestamp to your visuals, an option that you can find under Rendering settings.
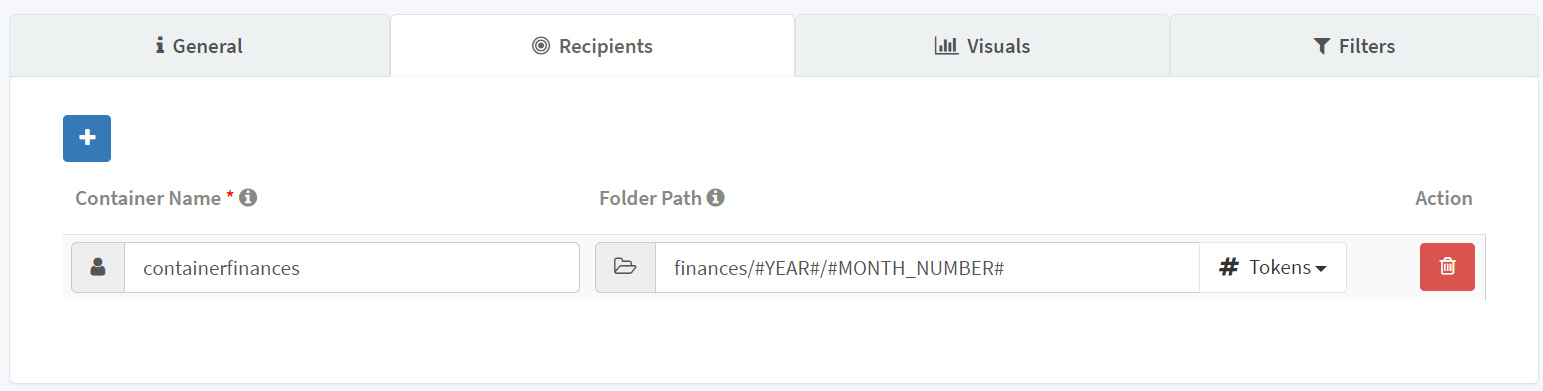
Once you’re done with the General settings, proceed to the Recipients tab. Unlike other delivery methods, reports and dashboards delivered to an Azure Blob Storage are stored in a container. To create a container in your Azure Blob Storage, press the blue plus (+) sign and name it. You can only use lowercase letters, numbers and hyphens when naming your container. After creating your container, you must set a folder path. Using (\) or (/) in this path will create a new folder within the previous one (ex: folder1/folder2/folder3).

Tokens are available when creating your folder path and they are highly recommended in an audit scenario since they ensure that your reports will be organized accordingly. In the following example, we are going to use a Year and a Month token when creating our folder path:
In the Azure Blob Storage, a Year folder will be created inside our container, and a month folder will be created inside our Year folder:
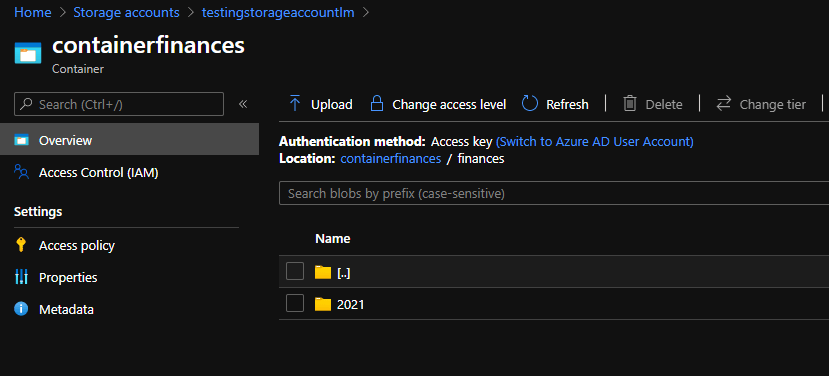
This method ensures that your reports will be automatically stored in the folder that matches their month and year. Like we previously saw when naming our files, you are free to use the tokens that best match your organizational style when naming your folder path.
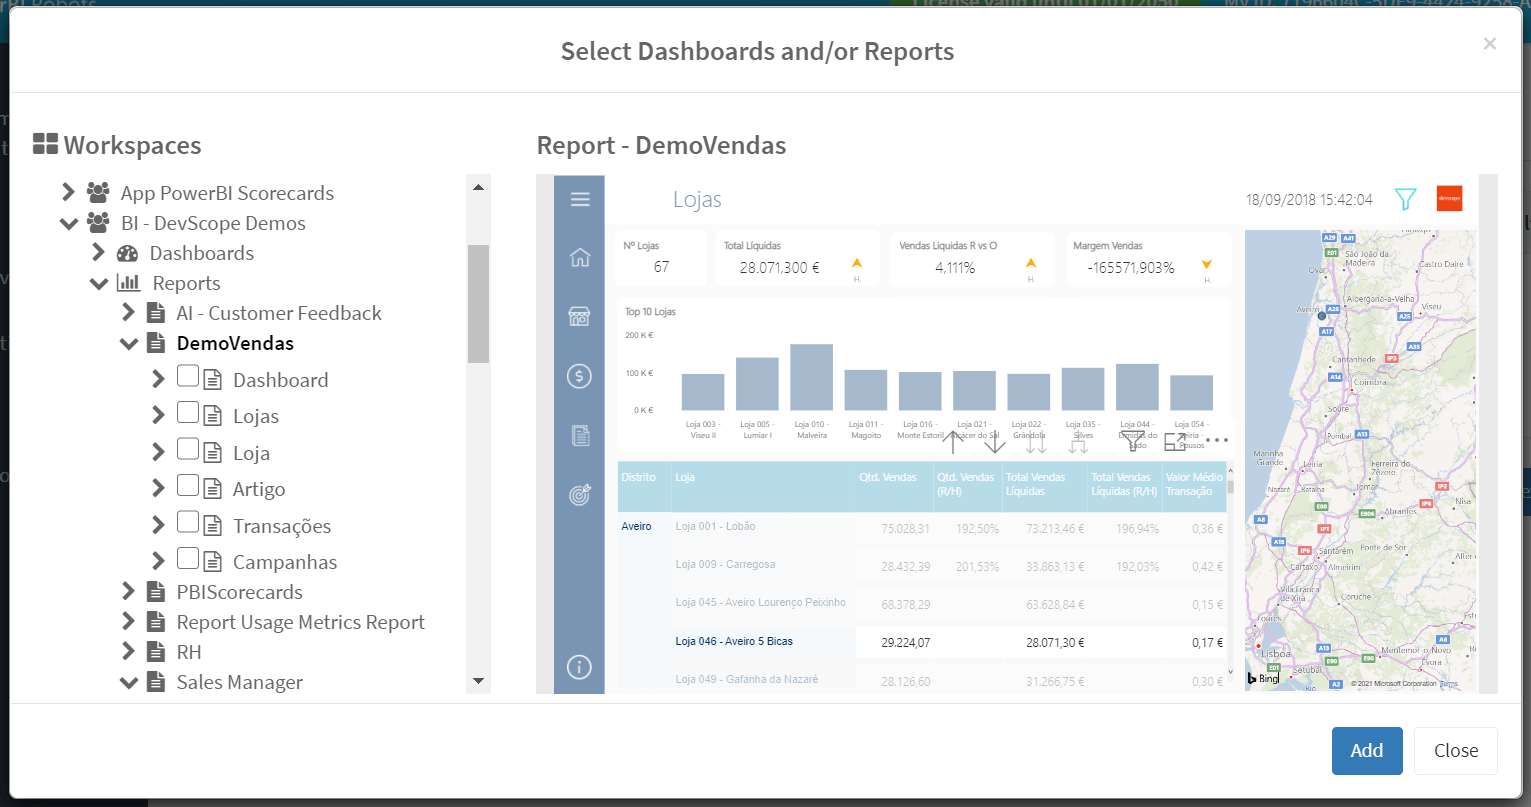
Next, proceed to the Visuals tab and click the method of adding visuals of your choice (Add Power BI visual or Add from Power BI Report Server). This will log you into your Power BI account and open a modal window with your Workspaces or one that lets you paste a SQL Report Server URL. Select the visuals you want your Azure Blob Storage to keep a record of.
Important note: If your playlist is outputting more than one file (i.e., if the output format is multiple report images, PDFs, or Excel files), their title in the Visuals tab will override the one you set on the General tab. Make sure you change the title on each visual to organize them accordingly and, once again, use the available tokens to make the information easier to navigate in the future.
Like in other delivery methods, you can change the title and size of your visuals and apply global filters. Additionally, you can apply visual level filters in the Filters tab.
Once you’re finished, click the Create button.
Running the PowerBI Robots service
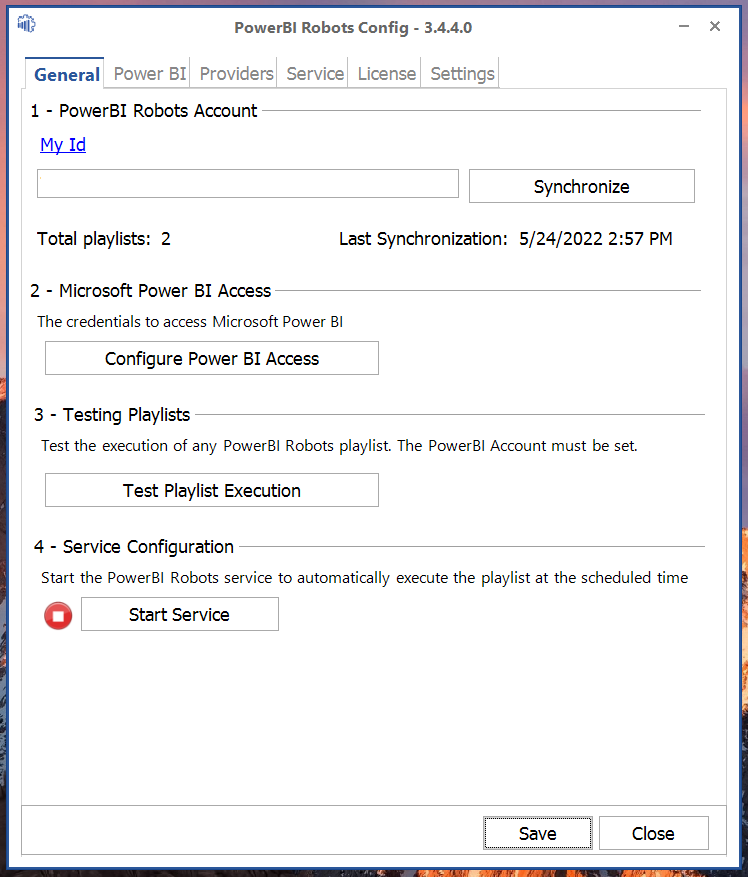
After creating a playlist, we must synchronize the PowerBI Robots agent so the service starts running. To do so, open the desktop agent, synchronize your ID (found in the web agent), log into your Power BI account and click the “Start Service” button.
Your PowerBI Robots service is now running. An important note you should keep in mind: whenever you make changes to your playlist, you must open the PowerBI Robots desktop agent and sync it for the service to reflect those changes. Otherwise, it will render the previous version of your playlist.
Accessing a playlist in your Azure Blob Storage
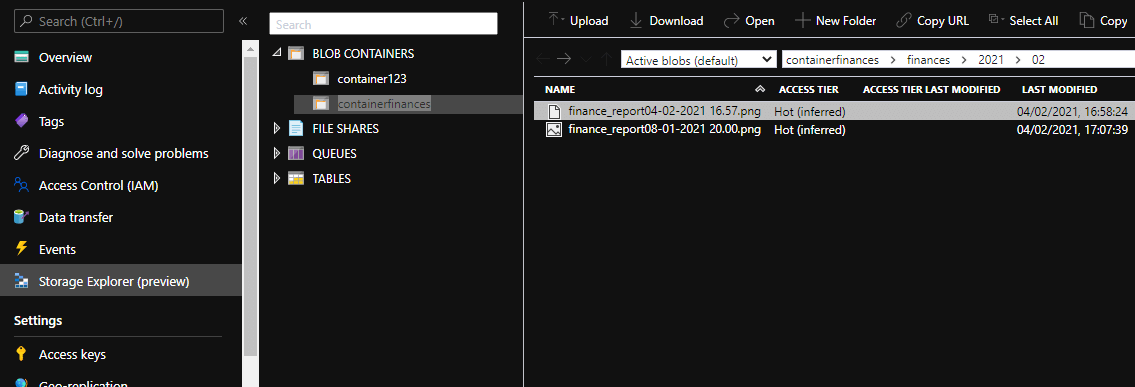
Finally, to access the files created by your PowerBI Robots playlist, return to the Azure Portal. From the side menu, go to your Storage Accounts, select the blob storage you previously created and click Storage Explorer. Collapse BLOB CONTAINERS to see a list of the containers you created in PowerBI Robots. When you click one of these containers, the files created by your playlist will be stored there.
Congratulations! Your Power BI audit evidence tool is now up and running! As previously mentioned, every time you add, edit or remove a playlist from PowerBI Robots, you must open the agent and click the Synchronize button for the changes to take place, otherwise, the service will run the playlist you had previously synchronized. To stop the service, click the Stop button in the Service tab or turn off the machine running the PowerBI Robots agent.
Using PowerBI Robots as an audit evidence tool is just the tip of the iceberg of what this tool can do for your organization. If you wish to learn more about its functions, such as automatically send Power BI reports by email, to a TV, editing filters in bulk, or applying individual filters, please check the extensive PowerBI Robots 101.
PowerBI Robots is available for 1.099€/year, but you can try it for free with a few limitations that don’t affect what we covered in this blog post.
If you still have any questions regarding PowerBI Robots, please check the product’s FAQs, the helper on the web agent, or contact us by email.

How we solved digital signatures and won the Teams Challenge
DevScope won the 2021 Microsoft Teams Challenge with DIVA, a solution that solves digital sigantures. Click the article to know more.